
Showing posts with label leather. Show all posts
Showing posts with label leather. Show all posts
Monday, March 13, 2017
Marine Green Faux Suede Dress
I purchased this fabric from Moodfabrics.com a few years (!!!) ago because it was on big-time sale and I thought the color was pretty. The quality is really nice and you can NOT tell it's fake except that it comes out of the laundry looking exactly like it went in. I lamented forever about what I wanted to make it into. I really wanted a skirt but thought the color would give me trouble when having to pair up with a matching top. McCall's 7466 was recently released with the envelope drawing showing a view in suede, and I knew instantly what my fabric wanted to become!


Monday, October 13, 2014
Vogue 1200 - Black + white houndstooth jacket w/ black leather inserts
I am on an outerwear kick. There is a whole pile of these types of garments in my queue that always gets shoved to the side for pretty dresses or simpler patterns. No more! I love outerwear and can't currently make fitted things anyway. Might as well stitch them up. This particular pattern is an Anne Klein design that came out in 2010. I purchased it right when it was released, decided on the fabric, and placed them both in my "winter planned garments" bin. As far as I know nobody ever made the jacket and blogged or wrote a review about it, and the pattern went out of print. Which is really too bad because it is a great design with some lovely details.

The design details I liked include the over-sized collar, bias sleeve and hem bands, bias sides (although I ended up changing those), two-piece sleeves, snap closures and topstitching. I decided to change the sides and undersleeves to leather for an on-trend look. In the end I had barely enough houndstooth for what you see, so that decision saved me from wasting my fabric.

The fabric is a woven houndstooth of mystery content purchased locally, most likely from Hancock fabrics. It is really thick but has a loose weave, so that it shed like crazy and had some drape. It did iron well, though, so there must be some cotton or rayon in it. It does not feel like polyester. I am not sure how insulated from low temps I am going to be wearing this jacket. However, because I live in southern Texas, I still think it will get plenty of wear.
Cutting this jacket out was almost the death of me. There are 19 pattern pieces, most of which are cut twice. Then, because the jacket is almost fully interfaced, you cut them all again in interfacing. I matched the houndstooth print across the fronts and made sure each side mirrored the other. This all had to be done on a single layer of fabric, and I used my triangle to make sure everything was square before I cut into it. I spent 4 days cutting it all out and really sweated those last few pieces fearing I wouldn't have enough fabric.

I was a little fearful this big collar would obliterate the shape of my shoulders, but it sort of curves up at the edges. I'm not sure if this is by intention on the part of the pattern designer or is caused by using a really thick fabric, but I really love the playfulness of it. Besides changing the sides to leather, the only two other deviations I made were to leave off the interfacing on the undercollar and omit the shoulderpads. With a collar covering a good bit of the shoulders, I didn't feel them necessary.

The lining is black Ambiance bought from JoAnne's. A nice thing about this pattern is the facing and lining to not meet up over a bust apex. Lots of big 4 patterns do and you end up with a seam right over the bust, which isn't too flattering. I also appreciate having a back facing.

You may notice something a bit different going on at the bottom of the lining. It is actually finished with a piece of grosgrain ribbon as per the instructions. This was my first time doing anything like this, and it really gave it a nice finish without the need to handstitch the bottom lining to the jacket.

I used large brass snaps from my stash for the closures. These use to come in black as well, but I thought the brass a nice change from all the black and white already present on the jacket. I went to replenish these the other day and they were no longer carried at Hancock fabrics. Hopefully JoAnne's still has them or I will have to find an online source instead. Sewing on these snaps really takes some time since I like to make sure all the snap holes are consistently the same along the entire edge.

The leather I used was purchased years ago from Fabricmartfabrics.com. They use to carry leather skins every fall and have a half off sale around Thanksgiving each year. I have a nice collection of colors and weights now that I'm slowly working my way through. I did interface the leather on the body to give it the same weight as the houndstooth body fabric. The sleeves were left un-interfaced, also per the instructions, so that they can bend easily and not look stiff.

Topstitching through two layers of thick fabric and two layers of interfacing was a bear. I had to stuff everything under my machine foot and the thread broke over any seams. I also broke at least 4 needles before wising up and using a more substantial leather needle.

Dressform pictures:


This project took at least 2 weeks to complete because of all the steps involved, but I had a lot of fun making it. The fabric behaved itself nicely and once I saw how flippy the collar was I got really excited. I'm extremely happy with the fit. I did not muslin since this jacket is suppose to be somewhat loose fitting, and I love how it skims the body without being overly boxy.
The design details I liked include the over-sized collar, bias sleeve and hem bands, bias sides (although I ended up changing those), two-piece sleeves, snap closures and topstitching. I decided to change the sides and undersleeves to leather for an on-trend look. In the end I had barely enough houndstooth for what you see, so that decision saved me from wasting my fabric.
The fabric is a woven houndstooth of mystery content purchased locally, most likely from Hancock fabrics. It is really thick but has a loose weave, so that it shed like crazy and had some drape. It did iron well, though, so there must be some cotton or rayon in it. It does not feel like polyester. I am not sure how insulated from low temps I am going to be wearing this jacket. However, because I live in southern Texas, I still think it will get plenty of wear.
Cutting this jacket out was almost the death of me. There are 19 pattern pieces, most of which are cut twice. Then, because the jacket is almost fully interfaced, you cut them all again in interfacing. I matched the houndstooth print across the fronts and made sure each side mirrored the other. This all had to be done on a single layer of fabric, and I used my triangle to make sure everything was square before I cut into it. I spent 4 days cutting it all out and really sweated those last few pieces fearing I wouldn't have enough fabric.
I was a little fearful this big collar would obliterate the shape of my shoulders, but it sort of curves up at the edges. I'm not sure if this is by intention on the part of the pattern designer or is caused by using a really thick fabric, but I really love the playfulness of it. Besides changing the sides to leather, the only two other deviations I made were to leave off the interfacing on the undercollar and omit the shoulderpads. With a collar covering a good bit of the shoulders, I didn't feel them necessary.
The lining is black Ambiance bought from JoAnne's. A nice thing about this pattern is the facing and lining to not meet up over a bust apex. Lots of big 4 patterns do and you end up with a seam right over the bust, which isn't too flattering. I also appreciate having a back facing.
You may notice something a bit different going on at the bottom of the lining. It is actually finished with a piece of grosgrain ribbon as per the instructions. This was my first time doing anything like this, and it really gave it a nice finish without the need to handstitch the bottom lining to the jacket.
I used large brass snaps from my stash for the closures. These use to come in black as well, but I thought the brass a nice change from all the black and white already present on the jacket. I went to replenish these the other day and they were no longer carried at Hancock fabrics. Hopefully JoAnne's still has them or I will have to find an online source instead. Sewing on these snaps really takes some time since I like to make sure all the snap holes are consistently the same along the entire edge.
The leather I used was purchased years ago from Fabricmartfabrics.com. They use to carry leather skins every fall and have a half off sale around Thanksgiving each year. I have a nice collection of colors and weights now that I'm slowly working my way through. I did interface the leather on the body to give it the same weight as the houndstooth body fabric. The sleeves were left un-interfaced, also per the instructions, so that they can bend easily and not look stiff.
Topstitching through two layers of thick fabric and two layers of interfacing was a bear. I had to stuff everything under my machine foot and the thread broke over any seams. I also broke at least 4 needles before wising up and using a more substantial leather needle.
Dressform pictures:
This project took at least 2 weeks to complete because of all the steps involved, but I had a lot of fun making it. The fabric behaved itself nicely and once I saw how flippy the collar was I got really excited. I'm extremely happy with the fit. I did not muslin since this jacket is suppose to be somewhat loose fitting, and I love how it skims the body without being overly boxy.
Thursday, October 31, 2013
Hodgepodge Burda - Navy + black plaid boucle jacket w/ leather trim
The navy and black color combo is currently a very popular trend. Even though I still think you shouldn't wear black shoes with a navy dress, I do like them together in fabrics or colorblocked. Which is why, when I spotted this black and almost-navy plaid boucle at Mood Fabrics, I knew I wanted it for something. It's Oscar de la Renta fabric with metallic threads and tiny black sequins, and reminds me somewhat of the fabric used for this dress - also OdlR, and also with sequins.

I decided on jacket 106 from the February 2013 Burda issue, but the quick muslin I made fitted horribly. The no-side-seams detail that I found somewhat interesting turned out to be woefully unflattering. So as not to have to find another similar style jacket and fit that to my body, I used another Burda pattern that I knew to be a perfect fit, 113 from the May 2011 issue, which I made and blogged about here. I transferred the neckline, length of the jacket and sleeves, and binding details, keeping the princess seams of 113.

The black leather was from my stash, from which I have made quite a few garments. This is my sixth garment using leather, and I don't perspire out of nervousness anymore. The only issue I find that gives me any problem is its tendency to stretch too much while being stitched. Usually this is solved by stitching with the fabric side up. Leather can be ironed without issue, and I always use pins IN THE SEAM ALLOWANCE so that the holes they cause aren't visible on the outside. I know other people use clips but I like to use pins and find they hold things more securely then clips.

I paid special attention when cutting the boucle out to match the plaids both horizontally and vertically. I also took special care to make sure they were lined up when stitched together. Oh, I forgot to mention that I underlined each boucle piece with polyester organza. The boucle has a very loose weave and the organza keeps it from fraying uncontrollably. Also, with organza attached, the construction stitches can be seen and removed if need be. Otherwise the thread disappears into the fabric and good luck clipping it out without cutting the fashion fabric.
Dressform pictures:


For the lining I used a black silk Jacquard from Mood Fabrics. Their picture on my screen had a bit of a purple tint, which would have been fine to line this jacket with, but it indeed turned out to be black. I love the fun textural interest it gave the inside. The inner band facings are a wool sateen I got awhile ago from Mood, which has now completely sold out. They were completely interfaced before being stitched together. After the lining was in and all the seam grading had been done, I went around the entire band with needle and thread, stitching in the ditch between the leather/boucle and the sateen/lining. I do like handsewing but that left my thumb really sore.
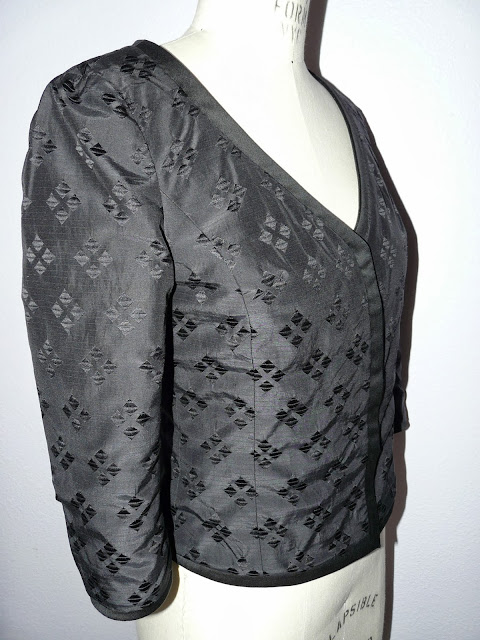
The last fun detail of this jacket is the oversized snaps used to hold it closed. I'll probably never wear it that way because it somehow ended up a bit too snug, but I like the looks of the tough hardware with so refined a jacket.

There were twelve pieces to the jacket body (it has two-part sleeves). Multiply that by three for the boucle, organza and lining. Add in six multiplied by two for the bands and band facings and that's 48 different pieces of fabric and leather! This jacket was a ton of work! I love it, though, and am excited to incorporate it into my cool-weather wardrobe in both dressy and casual stylings.

I decided on jacket 106 from the February 2013 Burda issue, but the quick muslin I made fitted horribly. The no-side-seams detail that I found somewhat interesting turned out to be woefully unflattering. So as not to have to find another similar style jacket and fit that to my body, I used another Burda pattern that I knew to be a perfect fit, 113 from the May 2011 issue, which I made and blogged about here. I transferred the neckline, length of the jacket and sleeves, and binding details, keeping the princess seams of 113.

The black leather was from my stash, from which I have made quite a few garments. This is my sixth garment using leather, and I don't perspire out of nervousness anymore. The only issue I find that gives me any problem is its tendency to stretch too much while being stitched. Usually this is solved by stitching with the fabric side up. Leather can be ironed without issue, and I always use pins IN THE SEAM ALLOWANCE so that the holes they cause aren't visible on the outside. I know other people use clips but I like to use pins and find they hold things more securely then clips.

I paid special attention when cutting the boucle out to match the plaids both horizontally and vertically. I also took special care to make sure they were lined up when stitched together. Oh, I forgot to mention that I underlined each boucle piece with polyester organza. The boucle has a very loose weave and the organza keeps it from fraying uncontrollably. Also, with organza attached, the construction stitches can be seen and removed if need be. Otherwise the thread disappears into the fabric and good luck clipping it out without cutting the fashion fabric.
Dressform pictures:


For the lining I used a black silk Jacquard from Mood Fabrics. Their picture on my screen had a bit of a purple tint, which would have been fine to line this jacket with, but it indeed turned out to be black. I love the fun textural interest it gave the inside. The inner band facings are a wool sateen I got awhile ago from Mood, which has now completely sold out. They were completely interfaced before being stitched together. After the lining was in and all the seam grading had been done, I went around the entire band with needle and thread, stitching in the ditch between the leather/boucle and the sateen/lining. I do like handsewing but that left my thumb really sore.
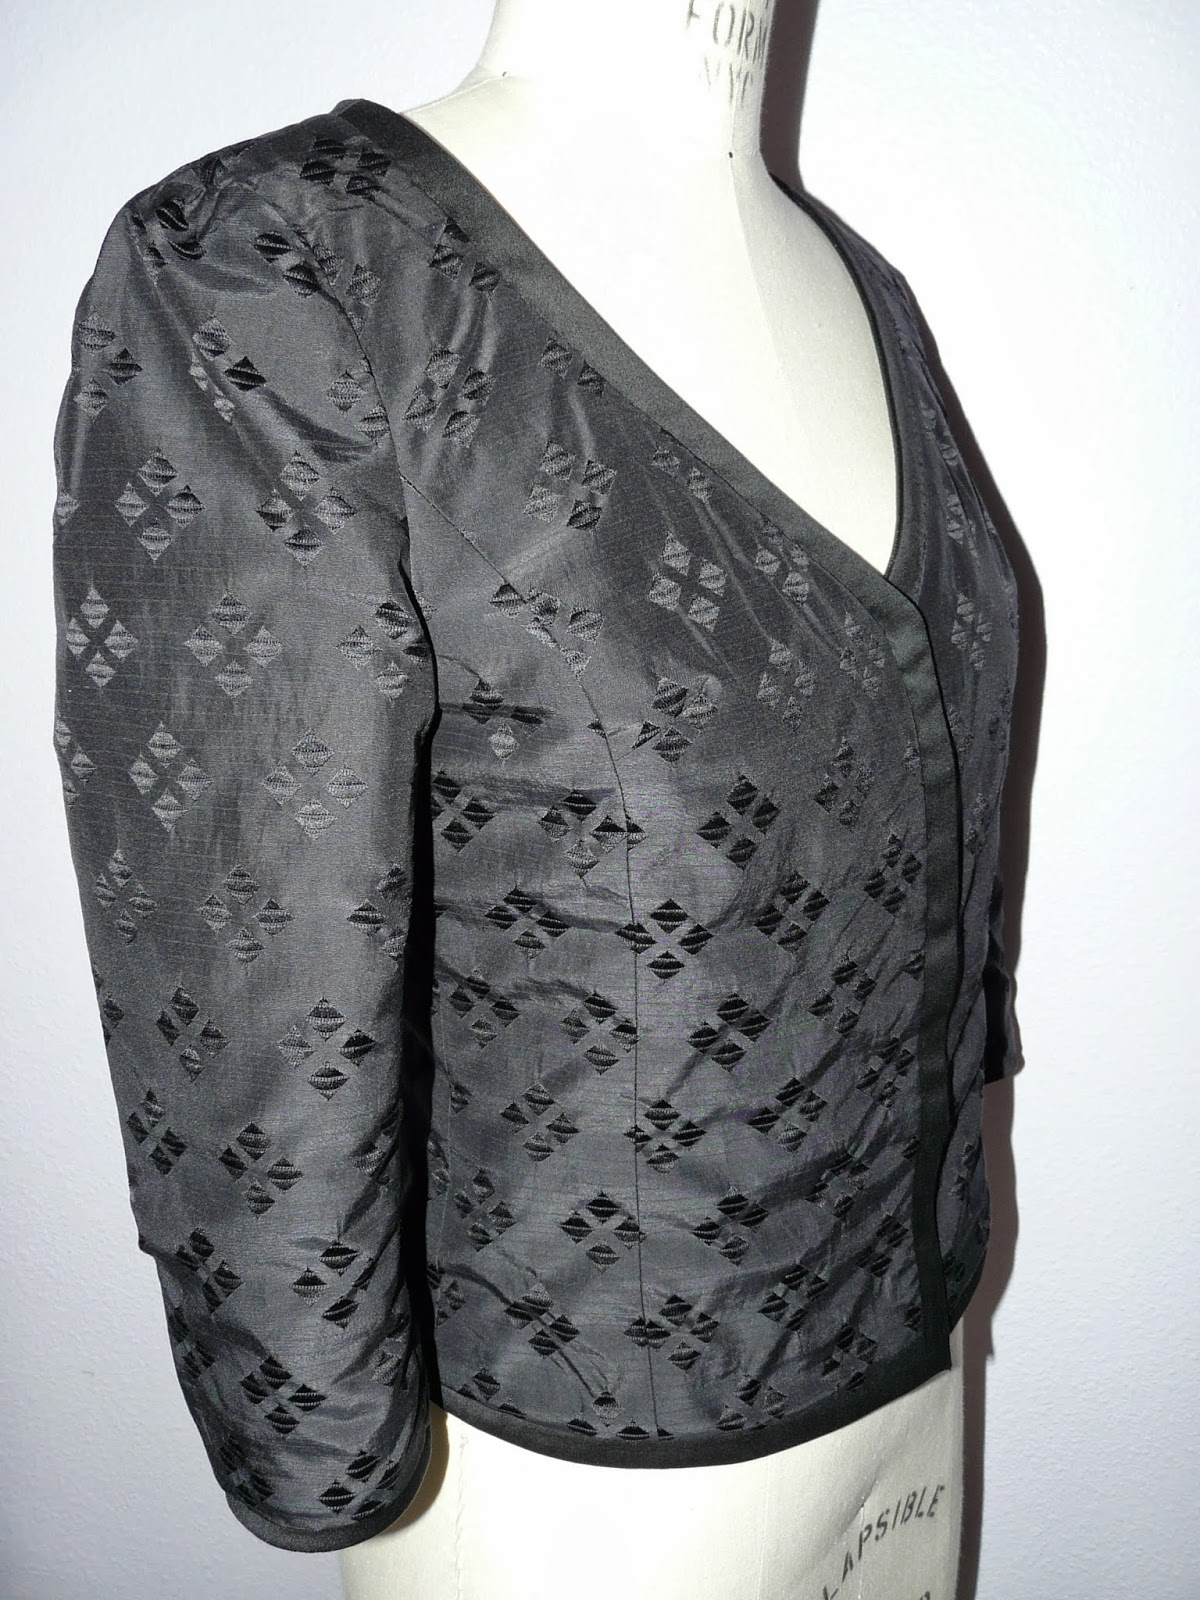
The last fun detail of this jacket is the oversized snaps used to hold it closed. I'll probably never wear it that way because it somehow ended up a bit too snug, but I like the looks of the tough hardware with so refined a jacket.

There were twelve pieces to the jacket body (it has two-part sleeves). Multiply that by three for the boucle, organza and lining. Add in six multiplied by two for the bands and band facings and that's 48 different pieces of fabric and leather! This jacket was a ton of work! I love it, though, and am excited to incorporate it into my cool-weather wardrobe in both dressy and casual stylings.
Saturday, March 30, 2013
Red leather skirt
I've had this red leather in my stash for a little over 2 years. There were three skins to start off with, then I made this dress last year and used up a whole hide. (It was suppose to have sleeves but they ended up pulling the dress oddly so were discarded.) For the remaining two skins I knew I wanted a skirt. There wasn't enough leather for anything with fullness so it had to be some sort of pencil skirt. But, being me, I didn't want plain and simple. I'll do simple if my fabric is busy but with solid colors I really like complicated designs.

This is skirt 116 from the September 2010 Burda. I love this design so much. There are no darts, and the shaped pieces fit together and mold around the body. It's totally unique. (I also love the dress version included in the same magazine - don't know when I'll get around to it, though.) Leather is totally unforgivable to sew with. Once it gets a hold punched through it with a needle there is no getting that hole to go away. I made a muslin to perfect the fit and found I only had to let the waist out a bit at the top side fronts. I let out a total of 3/4", which is a typical alteration for my somewhat square shape.

The fit of this skirt turned out really nice. It is figure hugging but not too tight. I shortened the pattern to hit right above the knees and had to remove the vent because of material shortage. As long as I don't try to climb any super tall steps it's not at all restrictive to movement.

I have no dressform pictures to show you the details because I could not get it over my dressform's hips. The reason for this is that the bottom is slightly pegged. Arg! Here are the front and back seaming details with the skirt flat on my bed:


Everything was going smoothly until I tried to put that zipper in. The first time I pulled the leather too much and ended up with a dimple below the bottom of the zipper. The second time looked better but I could see some of the holes from the first attempt and it no longer felt very sturdy. I took a day off to calm my nerves and ponder what to do next. Next day I ripped out the entire vertical seam, applied some iron on interfacing to the edge where the zipper was going, and re-stitched the seam taking a slightly bigger seam allowance. And would you believe I stretched it too much again and had yet another dimple at the bottom?!!! Out that came and I tried it once more, gritting my teeth and praying for mercy. It is still not perfect but oh well, I am not attempting another go.

I lined it with red Ambiance from voguefabricsstore.com. The directions did not call for any but I added interfacing to the top edges of the skirt. I really appreciated the separate lining pattern included with this design that didn't force me to reuse all the pieces that make up the front. Leather glue was used to affix the bottom hem in place.

I love my skirt! The leather is incredibly soft and buttery feeling. Hopefully I won't have any trouble creating outfits around this bright statement piece.
Here is the line drawing from the Russian Burda archives:

Sadly I did not get around to making an Easter dress this year for me or my daughter. I couldn't decide if I should make something warm or summery because the weather here tends to be unpredictable this time of year. Oh well, I've lots of pretty dresses to choose from. I'll check the temperature tomorrow morning and go from there. I hope you all have a wonderful Easter Sunday! I'll be cooking Easter lunch for my dad and immediate family and thanking God for the resurrection of his son Jesus!

This is skirt 116 from the September 2010 Burda. I love this design so much. There are no darts, and the shaped pieces fit together and mold around the body. It's totally unique. (I also love the dress version included in the same magazine - don't know when I'll get around to it, though.) Leather is totally unforgivable to sew with. Once it gets a hold punched through it with a needle there is no getting that hole to go away. I made a muslin to perfect the fit and found I only had to let the waist out a bit at the top side fronts. I let out a total of 3/4", which is a typical alteration for my somewhat square shape.

The fit of this skirt turned out really nice. It is figure hugging but not too tight. I shortened the pattern to hit right above the knees and had to remove the vent because of material shortage. As long as I don't try to climb any super tall steps it's not at all restrictive to movement.

I have no dressform pictures to show you the details because I could not get it over my dressform's hips. The reason for this is that the bottom is slightly pegged. Arg! Here are the front and back seaming details with the skirt flat on my bed:


Everything was going smoothly until I tried to put that zipper in. The first time I pulled the leather too much and ended up with a dimple below the bottom of the zipper. The second time looked better but I could see some of the holes from the first attempt and it no longer felt very sturdy. I took a day off to calm my nerves and ponder what to do next. Next day I ripped out the entire vertical seam, applied some iron on interfacing to the edge where the zipper was going, and re-stitched the seam taking a slightly bigger seam allowance. And would you believe I stretched it too much again and had yet another dimple at the bottom?!!! Out that came and I tried it once more, gritting my teeth and praying for mercy. It is still not perfect but oh well, I am not attempting another go.

I lined it with red Ambiance from voguefabricsstore.com. The directions did not call for any but I added interfacing to the top edges of the skirt. I really appreciated the separate lining pattern included with this design that didn't force me to reuse all the pieces that make up the front. Leather glue was used to affix the bottom hem in place.

I love my skirt! The leather is incredibly soft and buttery feeling. Hopefully I won't have any trouble creating outfits around this bright statement piece.
Here is the line drawing from the Russian Burda archives:
Sadly I did not get around to making an Easter dress this year for me or my daughter. I couldn't decide if I should make something warm or summery because the weather here tends to be unpredictable this time of year. Oh well, I've lots of pretty dresses to choose from. I'll check the temperature tomorrow morning and go from there. I hope you all have a wonderful Easter Sunday! I'll be cooking Easter lunch for my dad and immediate family and thanking God for the resurrection of his son Jesus!
Sunday, October 7, 2012
Red wool + leather DKNY dress knockoff
When I saw this advertisement of Ashley Greene in a DKNY leather and wool dress, I instantly knew I would copy it. Mixed material garments are everywhere right now, as are cutouts.

I was going to do it in black just like the example. However, as I was getting some winter projects together, I happened to set some red wool crepe next to my roll of leather hides. The reds were a perfect match, so I made a red dress instead.

The red lambskin I purchased awhile back to make into a skirt. I still have two skins of it left, maybe I'll get to that sometime this winter. Both fabrics were purchased online from Fabricmartfabrics.com. Sometimes they have really good sales on their skins, and I think these red ones were $15 a piece.

When I started work on this dress, I had nothing to go by except that taxi cab picture posted above. DKNY has since released the RTW dress on their website. Personally, I think it's a bit of a disappointment. The leather is pulling across the front and the cutout looks smaller because the neckline under the collarbone is lower. Obviously they made that dress custom for the Ashley. Anyway, mine is different in that it has leather across the back and no sleeves. (I actually did make the sleeves, but they pulled terribly, so I went back and removed them.) Also, their dress has a seam at the waistline and more of an A-line skirt. The top of it has princess seams which, had I thought to do the same, would have made the bust a LOT easier to fit. Oh well, there's more then one way to construct a garment.

The hardest part of this dress was getting a tight fit through the bust. If it was too tight the leather at the neck would gap forward; too loose and I was showing off my strapless bra. I worked and reworked this area quite a bit, and finally got it to a point I feel comfortable with. Good posture is a must AND, I'll be wearing it strictly as a date night dress and not to church.


I used that same bias tape finish for the armholes as my last dress. I also added a facing to the lower neckline and started the lining below that. The triangular shape of the leather was slipstitched to the lining after the upper neckline had been sewn by machine.

This dress has a full lining made from red polyester. I usually like to use Ambiance lining but couldn't find any in a matching shade.

I used a really old pattern from my stash, NewLook 6717, long OOP. I'm not sure why I hung on to it this long. I used to purge patterns after they'd been used and I made the ruffled version years ago. (It is now too big and I don't care for the floral anymore.) But, it's a nice basic dress with lots of variations and design possibilities. I made a muslin to perfect the fit and raised the neckline up to my collarbone. Then I drew a line where I wanted the wool to meet the leather and added seam allowances.

Knocking off designer dresses is fun and challenging. I'm hoping to get another one done in the next few weeks!
I was going to do it in black just like the example. However, as I was getting some winter projects together, I happened to set some red wool crepe next to my roll of leather hides. The reds were a perfect match, so I made a red dress instead.

The red lambskin I purchased awhile back to make into a skirt. I still have two skins of it left, maybe I'll get to that sometime this winter. Both fabrics were purchased online from Fabricmartfabrics.com. Sometimes they have really good sales on their skins, and I think these red ones were $15 a piece.

When I started work on this dress, I had nothing to go by except that taxi cab picture posted above. DKNY has since released the RTW dress on their website. Personally, I think it's a bit of a disappointment. The leather is pulling across the front and the cutout looks smaller because the neckline under the collarbone is lower. Obviously they made that dress custom for the Ashley. Anyway, mine is different in that it has leather across the back and no sleeves. (I actually did make the sleeves, but they pulled terribly, so I went back and removed them.) Also, their dress has a seam at the waistline and more of an A-line skirt. The top of it has princess seams which, had I thought to do the same, would have made the bust a LOT easier to fit. Oh well, there's more then one way to construct a garment.

The hardest part of this dress was getting a tight fit through the bust. If it was too tight the leather at the neck would gap forward; too loose and I was showing off my strapless bra. I worked and reworked this area quite a bit, and finally got it to a point I feel comfortable with. Good posture is a must AND, I'll be wearing it strictly as a date night dress and not to church.


I used that same bias tape finish for the armholes as my last dress. I also added a facing to the lower neckline and started the lining below that. The triangular shape of the leather was slipstitched to the lining after the upper neckline had been sewn by machine.

This dress has a full lining made from red polyester. I usually like to use Ambiance lining but couldn't find any in a matching shade.

I used a really old pattern from my stash, NewLook 6717, long OOP. I'm not sure why I hung on to it this long. I used to purge patterns after they'd been used and I made the ruffled version years ago. (It is now too big and I don't care for the floral anymore.) But, it's a nice basic dress with lots of variations and design possibilities. I made a muslin to perfect the fit and raised the neckline up to my collarbone. Then I drew a line where I wanted the wool to meet the leather and added seam allowances.

Knocking off designer dresses is fun and challenging. I'm hoping to get another one done in the next few weeks!
Wednesday, February 1, 2012
McCall's 6402 - Leather + Wool black mini skirt
If you will recall, mixed material clothing was item #5 in my fall/winter must haves list. First I made the Johathan Saunders knock-off dress in leather and wool. Now I've completed my second garment in that category, a leather and wool mini skirt:
 |
| It was super bright outside when we were taking these photos! |
This is my third time to use leather, and I am definitely gaining confidence with it! I was able to squeeze the pieces for this skirt out of that same skin I used for the above mentioned dress as well as the accents for this jacket. With my second black skin I plan to make some leather shorts. (Not sure if I'll get to those this winter or not.)

I liked this pattern for the interesting side pieces and the idea of doing them in leather. (Although on their example they used pleather.) I used my TNT waistband and did only minor adjustments to the muslin. This was a pretty easy garment except for the intersecting sides where the leather points all meet. THAT was no picnic. I had to use pins, people. On leather. But I only pinned in the seam allowances so none of the puncture marks show on the outside. It worked out well in the end.

I hemmed the bottom wool gabardine by hand and used some leather glue for the leather. BTW, both the leather and the wool gab were purchased from Fabricmartfabrics.com. They have excellent sales on skins from time to time and I now have a few different colors in my stash.

The back invisible zipper was no fun to put in either. This skirt is snug, and for some reason the zipper was poking out at the bottom giving me a tail bump. I'm sure you've all experienced that from time to time while putting in a zipper. I'm telling you, I could not find a solution. Easing in the fabric did not correct the problem. I thought about moving the zipper to the side seam, but could not fathom trying to get the sides to match up again with the added issues of an invisible zipper. After a few days of feeling sad every time I passed it on my dressform, I thought to take out the extra fabric in the back at the center bottom of the leather panels. (I took out 3/8" of the wool gab at the center back tapering to nothing a few inches towards the sides.) Don't ask me why this worked but the tail bump went away. AND I figured out that it can be helpful to hand baste in an invisible zipper if it is being particularly difficult.
Here is the envelope picture:

I did add a full lining in black Ambiance which I didn't take a picture of since we are having a string of overcast days. For the lining, I was able to use the back of view D, but had to use the pieces from view A for the front.
I'm very happy with this skirt. It gives textural interest to a basic black bottom pairing and is a fun trend to participate in.
Wednesday, January 11, 2012
10-2008-131 - Black & white silk cropped jacket w/ leather details


Haha - here I am mimicking the magazine pose:


Shoulder close-up:

The full lining was done in Ambiance:


I'll be making a few things for Rachel next from an Oliver + S pattern. Also, the February issue of Burda is another good one that I just placed an order for. Perhaps I should just renew since they have gotten so good lately...
Subscribe to:
Posts (Atom)