Wednesday, October 21, 2015

Vogue 1265 - Pamella Roland maroon wool crepe dress

It only took an entire month for me to make but I finally have a new dress! This Pamella Roland pattern, Vogue 1265, came out in 2011 and I just loved it. It's such a fun design - all business in the front and party in the back. There are hardly any reviews for it on patternreview.com and it's now out of print. (Anyone else feel sorry for these types of designer patterns that are lovely but largely ignored?) The envelope gives it an average skill rating and it's not a really difficult thing to make, but there is a ton of fabric in the skirt and that part gets attached early. It's a lot to keep up with and work around.


I made a muslin of the body and front skirt, but not of the back flared skirt. Based on that I cut a size 10 in the front from the arms down, tapering out to a 12 through the waist. For the back I cut a 12 from the shoulders to the waist, and a 10 from the waist to the hips. The front darts had to be pulled in a bit as there wasn't much bust shaping underneath them. I shortened the front slit at least 2 inches for personal preference. It's really just a design element as you don't need it to be able to walk well. The fabric at the shoulders extended out a little too far, and I do not have narrow shoulders. I cut 1/2 inch from that area, tapering to nothing at the sleeve sides.
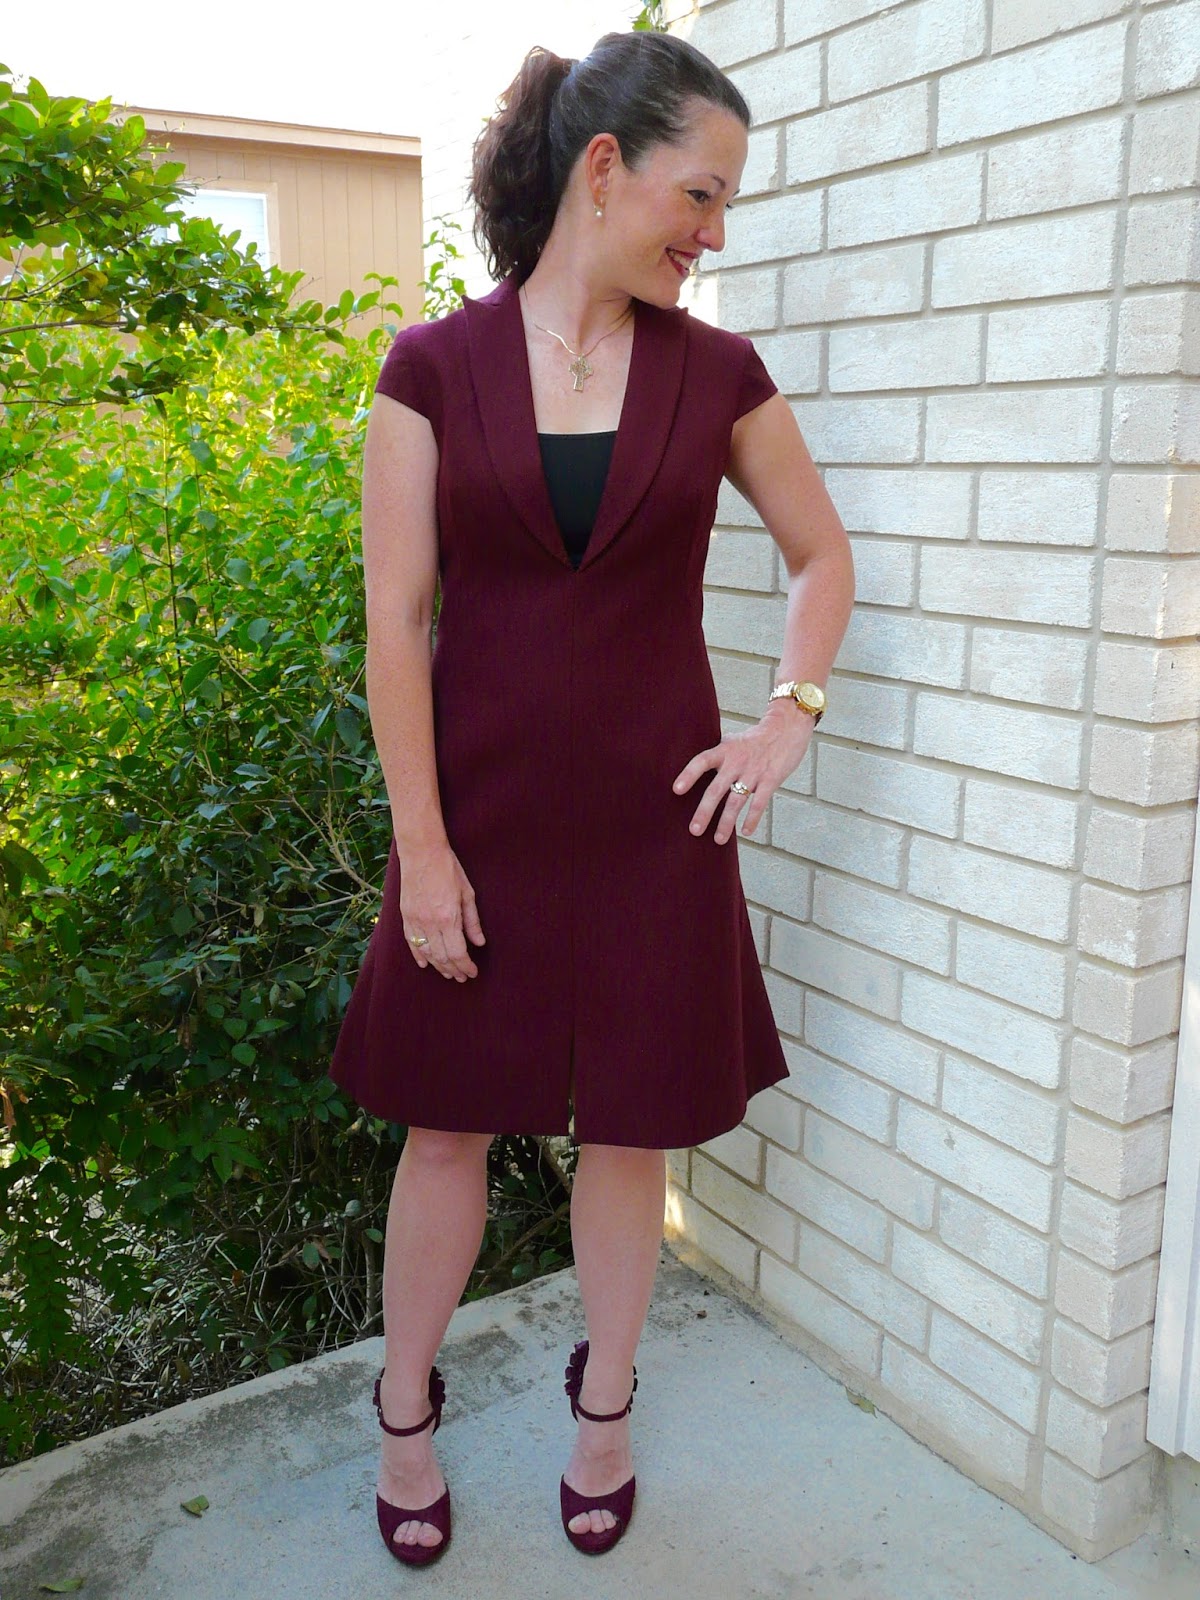

I bought the fabric online somewhere several years ago. It's a nice weight wool crepe, which is always a well behaved fabric to work with. It drapes and presses well. The lining is Ambiance purchased locally.


This back skirt was quite a bit of work. The instructions have you pin it to another piece of fabric and let the bias parts stretch for 24 hours. I then basted it the the back pieces, pinned it to my dressform, and marked the hemline as straight as I could. After I trimmed away the uneven bits of the crepe, I lined it up with the lining and trimmed the lining as needed. There is a double pleat at the center back and two pleats at either side back seam, making for an extremely full skirt. Because the lining is sewn to the bottom of the skirt, there is no hem to turn up and sew invisibly, THANK GOODNESS.


One thing the instructions call for is interfacing all of the dress body except for the back skirt and the sleeves. I was unsure of what this would look like and didn't want a really stiff dress. However, I went ahead and interfaced everything with a nice weight woven fusable and the result is a dress that holds its shape but is not stiff.


Obligatory twirling picture:


Dressform pictures:
(The lighting in my room is mostly indirect this time of year and this fabric really soaked it up. I had to use a flash and lighten these pictures up quite a bit. I'm sorry if they're hard to see.)


There is an invisible zipper down the left side, which I ordered in a matching maroon from NYC. You can see the slight color difference in the crepe and the lining. I really like when the lining peeks out at the hemline when I'm walking or sitting. It's subtle but adds interest to a solid colored garment.


Here you can see the front lining. I really like how the front facing extend down to the slit area along the hemline.


There was a bit of handstitching involved. Here I have sewn the back body lining down invisibly to the top of the back skirt lining.


I changed the sleeve insertion slightly. I won't go into a lot of detail but I ended up using bias tape to finish off the armhole and then stitched it invisibly by hand to the dress lining. I did a similar finish to the sleeves on this dress, oddly enough another Pamela Roland design. You can read about it on that post if you want.


I adore my new fall wardrobe addition. It has that heavy weighted feeling of an expensive garment, if you know what I mean. I have plans to make some sort of sequined or beaded top to wear underneath. Now, on to something that doesn't involve miles of fabric or tedious fitting tweaks!

Tuesday, September 8, 2015

Simplicity 1462 - Turquoise floral fitted cotton top

It seems like I never have enough casual tops. Just when I find one I really like it gets a stain or a hole or a funky smell that just won't come out no matter how much it's laundered. Also I never want to make them. Why is this? Are they without challenge? Do I hate my top half and therefor never want to dress it? I'm going to have to remedy this. (But not in the immediate future. My current queue is all designer dresses and outerwear. Ha!)


This fabric is a beautiful cotton print from designer Anna Maria Horner and was purchased online a year or so ago. I bought it for my daughter but I loved the print so much that I decided to use it for myself instead. How selfish of me. In my defense I knew she would outgrow whatever I made for her in a single season. This way it can live forever in my closet.


I only had 1.5 yards of it and wanted something slightly structured. Simplicity 1462 has been in my stash for a few months now. I adore the cap sleeves in this version and the front ribbon embellishment. This floral is lineal and the pattern pieces needed to be carefully laid out so that the flowers lined up horizontally and no twinning occurred. The flowers aren't perfectly matched from seam to seam because that would be impossible in a princess seamed garment like this one. Rather I was trying to make it so no two flowers of the exact same were right next to each other. I was mostly successful.


In order to make a small bust adjustment without too much fiddling I cut the size 10 in the front through the bust tapering out to a 12 at the waist and below. The shoulders and back were cut in a 12 as well. It was a bit snug so I took only a 3/8" seam allowance at the sides. I cut 2" off the hemline and took a 2" hem. This shirt is drafted to be pretty long.


Those two flowers under my right arm aren't twins of each other but they do bug my eyes a little. Good thing that's under an arm where it's not too noticeable. When I attached the neckbinding and got the inside all slipstitched down, I noticed that the front and back neckline gaped away from my body. This is because the neckbinding that was drafted for this pattern is way too big. I carefully unpicked the whole thing - after a few gusty sighs - and cut 3/8" off the neckline, then reattached my binding. It would have been easier if I'd had more fabric to work with but I was on fabric fumes at this point. Happily this is a sturdy cotton and didn't give me too many problems. If you are contemplating making this pattern, I would go down about 2 sizes for the neck binding.

Dressform pictures:


This print is much more vivid and accurate in these inside shots. You'll definitely see me coming from a long way off!


I made french seams at every inside seam except the zipper side and the center front. For the center front I extended the slit facing down to the hemline to give the ribbon a sturdy place to be stitched to. It looks neater as well. The hem I whip-stitched by hand.


The pattern calls for bias tape to finish off the underarm seams. I couldn't find any to match and didn't have enough fabric to make bias facings, so I used some aqua silk crepe de chine left over from a failed project. I also used it to hong-kong finish the edges of the seam where the zipper in inserted, but it's not really visible from this picture.


That's the last of my warm weather sewing! It's still hot as anything here but I am moving on to fall now. I never get to all the cold weather projects I want to make because I get extremely busy with holiday preparation and then get tired of the cold really quickly and can't wait for summer. Every year my sewing mojo disappears around the new year too. This year I am starting early on long sleeves and outer wear and hope to make up some of those long planned winter garments.

My oldest and my youngest

Wednesday, August 26, 2015

Vogue 1440 - White cotton tunic w/ back yoke detail

I'm taking a break from making silk blouses to add some cotton to my wardrobe. It's much easier to wear here in the summer and doesn't stick to sweaty skin as easily. I used Vogue 1440, a separates pattern by Donna Karan. Now this is a great pattern! You get three designer pieces that are very wearable for the price of one. The blouse was what called my name first, but I do plan to make both the jacket and the pants at some point.


What I loved about this design was the armhole bands and interesting back yoke feature. It calls for a solid color to show off those areas, and I picked a crisp white cotton shirting from Mood fabrics. This is a nice medium weight fabric that holds its shape well. Good quality cottons are always fun to sew with as they press well and don't slip around on you.


I really deliberated about what size to cut. Usually I cut a 12 for Vogue patterns but the bust measurements printed on the pattern were really big. My measurements put me at an 6 but I never wear that small of a size so I went for the 10 just to be safe. I'm so glad I did as the bust measurements are just plain wrong. The size 10, for example, is suppose to be 37.5" around, which I would be swimming in. As you can see, it is pretty fitted. If you decide to make this blouse, I advise actually measuring the pattern for yourself to determine which size to cut. I folded 1.5" out of each front pattern piece between the dart and the center front before I cut into the fabric. I wanted an easy-fitting blouse but it is really voluminous as drafted. This pattern could easily be used for maternity wear!


I just adore the back!!! Anyone with a muscular back or shoulders should make this top. I have neither but still think it's flattering. I'm seeing lots of RTW with that back slit detail which is another nice feature.


After I got the blouse to a stage where I could try it on but didn't yet have the collar attached, I noticed that the front neckline was really high. And then I really got to looking at the blouses others have made from this pattern and noticed how those collars folded over past the armbands. I think it's drafted that way on purpose to give it more of a relaxed look, and I can't tell if the original is like that or not. However, I wanted more of a traditional collar look for my blouse. I cut the center fronts down by 1" and used the collar and collar stand from another Vogue pattern. If I make this pattern again I will raise the center back neckline a little as I think it's pulling the collar down in the back. Weird. The front was too high and the back is too low.


Does anyone else get excited about reading pattern directions? I couldn't wait to get my hands on this pattern so I could figure out how that back band was attached. It's so unique. I did change the order of stitching the bands to the fabric in order to avoid lumpy shoulders. Being precise while topstitching is always fun to me so I enjoyed those parts a lot.

More dressform pictures:


The concealed button closure has no interfacing called for. This made me a little nervous but it turned out fine in the end and isn't floppy at all. If using a fabric that is lighter weight you may want to add interfacing to this area.


Something else I love about this pattern are the beautifully finished insides included in the directions. All fabric edges are enclosed in some manner and there's no overlocking needed. There is a bias hem facing pattern piece which I was super excited about. Wow, that made making the hem SO MUCH EASIER then the usual double folded hem that puckers and never will lay completely flat. I am using a bias hem facing for all shaped hems from now on.


This was such a fun project to work on! I think I might use the top part of this blouse again and make more of a fitted/shorter garment just for some variety. It's too lovely of a design not to make a second time.

Note: This fabric was purchased with my Mood Fabrics monthly allowance, as part of my participation in the Mood Sewing Network.