Tuesday, December 1, 2015

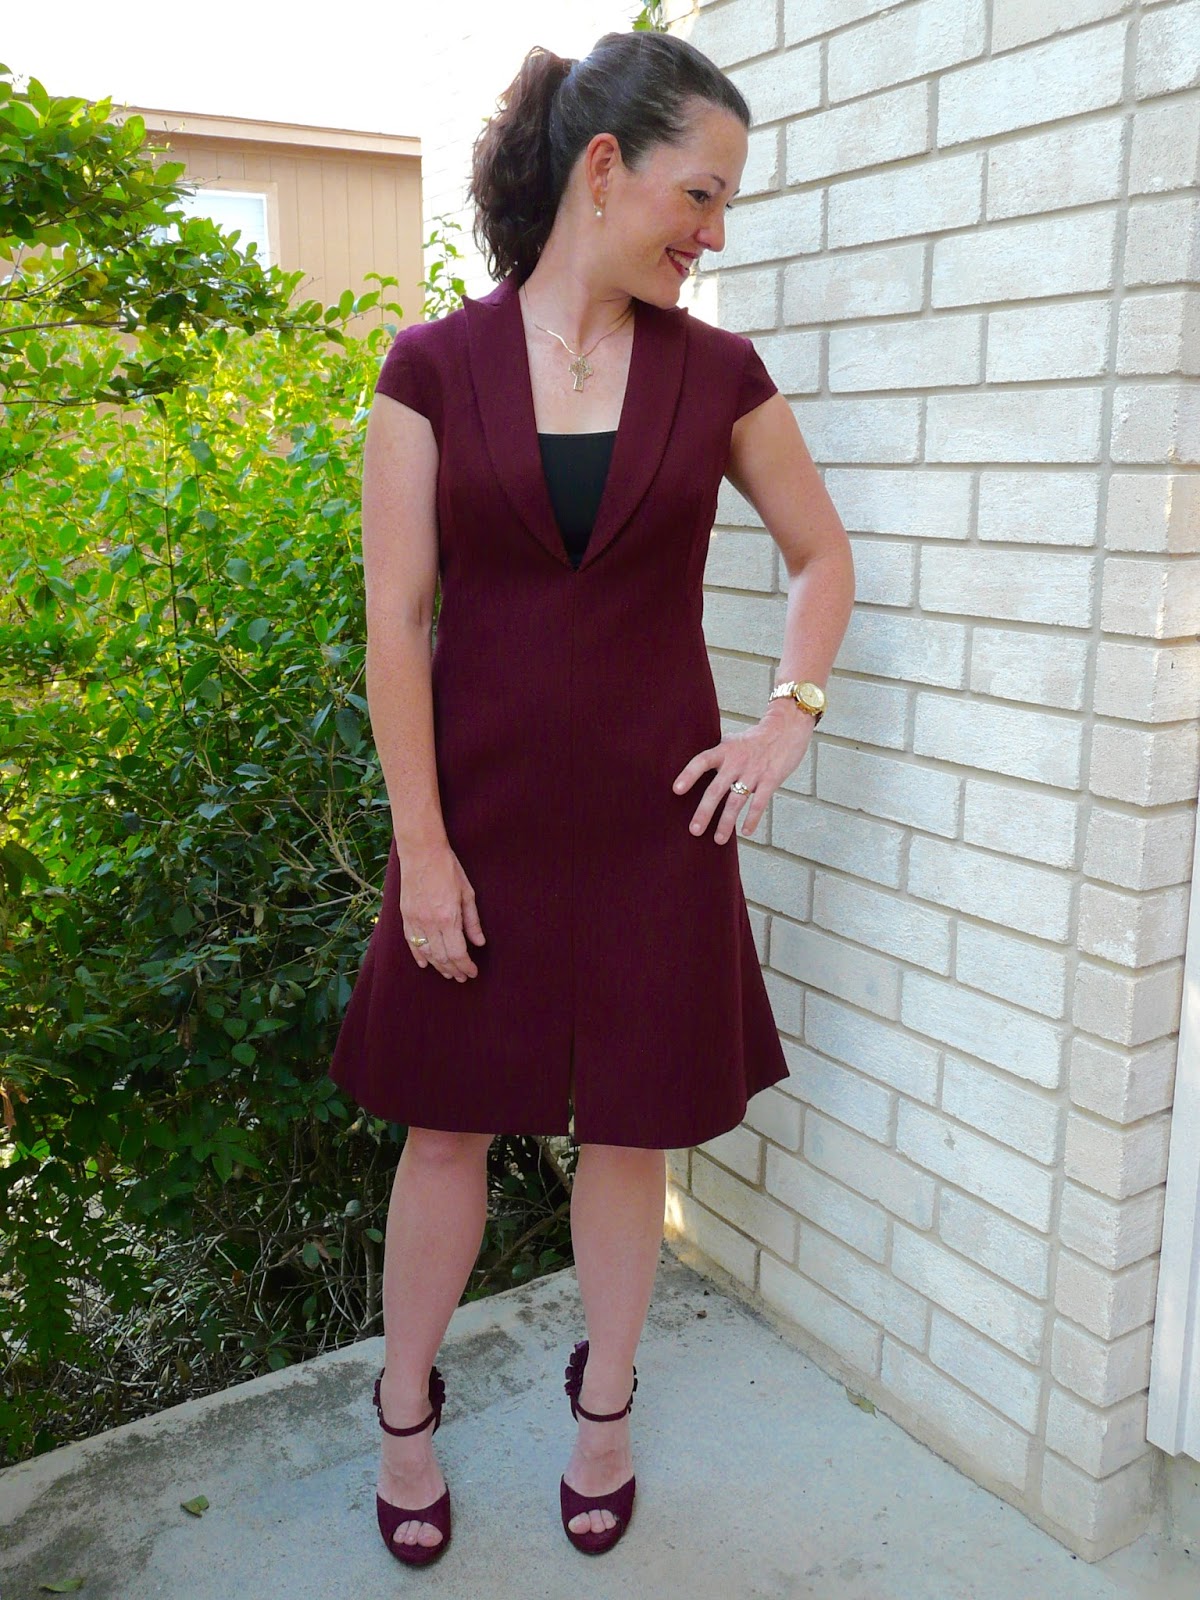
Vogue 8946 - Fuschsia wool ponte dress

Ponte knit is a well known and much loved fabric amongst the sewers of the world. It’s beefy and stable qualities make it a great option for body-con dresses and structured designs. I’ve sewn with my fair share of it over the years and, as with most fabrics, there is a spectrum of quality available. When I spotted this “fuchsia rose wool ponte knit” on Mood Fabric’s website some months ago, I snapped it up faster then lightning. I adore natural fibers and was positive that a ponte knit made from wool would be heaven to work with. Unfortunately many other people must have been as intrigued as I was since it sold out in record speed. However, here is a neat striped jersey knit that I’ve had my eye on for awhile that looks to be similar, and I currently have this plaid ponte in my stash awaiting the perfect pattern pairing.


The fabric was 60″ wide so I purchased my standard I-don’t-know-what-I’m-going-to-make-with-this length of 2 yards and went combing through my extensive pattern stash. Vogue 8946 immediately jumped out at me. The pleating details would really sing in a solid color and the long sleeve version would be perfect for winter.


I did a bit of pattern research and decided to cut my typical Vogue woven pattern size of 12. Usually I will go down a size for anything made in a knit fabric but this dress was described as close-fitting and it certainly is. After I got the fronts pleated and the top sewn to the bottom, I pinned it on my dressform and used liberal amounts of steam to get the pleats to lay nicely. This is where using a wool really worked out. It was simple to manipulate and took the shape of my dressform easily.


This pattern calls for a back zipper and, even though I was working with a knit, I did my best to follow the instructions. I do prefer a zipper in dresses as I often do my hair and makeup before getting dressed and they’re just easier to put on and not get smeared with deodorant or powder. I fused some knit interfacing along the center back and made several passes at zipper insertion. Every Single Time the bottom stuck out like a tail until I finally admitted defeat and did away with it.


The body of this dress is fully lined in black tricot from my stash. Vogue included a separate front pattern piece for the lining, which I always appreciate. Apologies for the dark pictures. We haven't had much sun around these parts lately.


I finished all the wool seams with the overlocking stitch on my machine. I don't think the edges would have unraveled much, but they did change in appearance when they came in contact with my iron. Better safe than sorry.


I took a 1.5″ hem instead of the narrow hem the directions call for. I slip-stitched it by hand onto the tricot knit lining. I also slip-stitched the sleeve hems by hand but not onto lining as I left the sleeves unlined.


Hurray! Another long sleeve dress to add to my wardrobe! That brings my total up to 5, not including my funeral dress or sweater dresses. I have other dresses I consider winter appropriate, but most are 3/4 sleeves or shorter - not sure why. Anyway, I do want to use this pattern again for a sleeveless summer version but I’ll definitely be adding some length to the hemline. I like the shorter length for tights and boots but probably not for bare legs.

Photo bombed again!
Note: This fabric was purchased with my Mood Fabrics monthly allowance, as part of my participation in the Mood Sewing Network. 

Tuesday, November 24, 2015

Vogue 1283 - Navy viscose knit asymmetric dress

This is the garment I made in October for the Mood Sewing Network. I kept putting off posting it here, thinking I would find some time to take some interior/closeup pictures. Alas it has been an extremely busy month and is about to get even busier with the holidays upon us, so I'm just going to write this post with the pictures I already have.

I used Vogue 1283, a Tom and Linda Platt designer pattern from 2012 that now looks to be out of print. I always thought this design was really interesting with its asymmetrical gathers on the front and back of the dress. The cut-in-one sleeves were never my favorite though. Extra fabric folded up under my armpit is not a look I enjoy. I thought I might be able to modify the pattern to have set-in sleeves instead, and traced the armhole curves from another long sleeved knit dress pattern. I also used the sleeve pattern piece from that pattern. Success! I always love when a frankenpattern comes together.


I knew I’d need something thin to handle all the gathers and I also wanted a fabric with some weight so that the dress would drape nicely. Enter this midnight blue solid viscose knit from Mood Fabrics. I swatched it since I’d never worked with viscose knit before. The description on Mood’s website is accurate, it is a dense fabric with a beautiful drape.


This pattern is lined with the same fabric as the dress. If planning to make this design, don’t do what I did and think you don’t need the stay tape along the gathers and neckline. I don’t know if it was the fabric or not, but those gathered areas and neckline really stretched out when they came in contact with my iron. I went back with clear elastic to reinforce those areas. I added 2.5″ to the hemline and then took a 1.5″ hem whip-stitched by hand in place. I also whip-stitched the sleeve hems. I usually hem knits with a twin needle but wanted a cleaner finish for this dress.


This fabric will show iron marks so iron on the reverse side or use a press cloth with it. It was easy to work with and very luxurious feeling – almost like a thick silk jersey. I also already laundered this dress by washing it on the handwash setting and laying it flat to dry. Other than needing a slight pressing it came out without any change in appearance.


I'm super pleased to add another long sleeved dress to my closet. Here's my little photo-bomber:


Note: This fabric was purchased with my Mood Fabrics monthly allowance, as part of my participation in the Mood Sewing Network.

Wednesday, October 21, 2015

Vogue 1265 - Pamella Roland maroon wool crepe dress

It only took an entire month for me to make but I finally have a new dress! This Pamella Roland pattern, Vogue 1265, came out in 2011 and I just loved it. It's such a fun design - all business in the front and party in the back. There are hardly any reviews for it on patternreview.com and it's now out of print. (Anyone else feel sorry for these types of designer patterns that are lovely but largely ignored?) The envelope gives it an average skill rating and it's not a really difficult thing to make, but there is a ton of fabric in the skirt and that part gets attached early. It's a lot to keep up with and work around.


I made a muslin of the body and front skirt, but not of the back flared skirt. Based on that I cut a size 10 in the front from the arms down, tapering out to a 12 through the waist. For the back I cut a 12 from the shoulders to the waist, and a 10 from the waist to the hips. The front darts had to be pulled in a bit as there wasn't much bust shaping underneath them. I shortened the front slit at least 2 inches for personal preference. It's really just a design element as you don't need it to be able to walk well. The fabric at the shoulders extended out a little too far, and I do not have narrow shoulders. I cut 1/2 inch from that area, tapering to nothing at the sleeve sides.


I bought the fabric online somewhere several years ago. It's a nice weight wool crepe, which is always a well behaved fabric to work with. It drapes and presses well. The lining is Ambiance purchased locally.


This back skirt was quite a bit of work. The instructions have you pin it to another piece of fabric and let the bias parts stretch for 24 hours. I then basted it the the back pieces, pinned it to my dressform, and marked the hemline as straight as I could. After I trimmed away the uneven bits of the crepe, I lined it up with the lining and trimmed the lining as needed. There is a double pleat at the center back and two pleats at either side back seam, making for an extremely full skirt. Because the lining is sewn to the bottom of the skirt, there is no hem to turn up and sew invisibly, THANK GOODNESS.


One thing the instructions call for is interfacing all of the dress body except for the back skirt and the sleeves. I was unsure of what this would look like and didn't want a really stiff dress. However, I went ahead and interfaced everything with a nice weight woven fusable and the result is a dress that holds its shape but is not stiff.


Obligatory twirling picture:


Dressform pictures:
(The lighting in my room is mostly indirect this time of year and this fabric really soaked it up. I had to use a flash and lighten these pictures up quite a bit. I'm sorry if they're hard to see.)


There is an invisible zipper down the left side, which I ordered in a matching maroon from NYC. You can see the slight color difference in the crepe and the lining. I really like when the lining peeks out at the hemline when I'm walking or sitting. It's subtle but adds interest to a solid colored garment.


Here you can see the front lining. I really like how the front facing extend down to the slit area along the hemline.


There was a bit of handstitching involved. Here I have sewn the back body lining down invisibly to the top of the back skirt lining.


I changed the sleeve insertion slightly. I won't go into a lot of detail but I ended up using bias tape to finish off the armhole and then stitched it invisibly by hand to the dress lining. I did a similar finish to the sleeves on this dress, oddly enough another Pamela Roland design. You can read about it on that post if you want.


I adore my new fall wardrobe addition. It has that heavy weighted feeling of an expensive garment, if you know what I mean. I have plans to make some sort of sequined or beaded top to wear underneath. Now, on to something that doesn't involve miles of fabric or tedious fitting tweaks!