I always enjoy watching Anna Sui’s fashion shows. Her designs are
playful and fun but not toddler like and twee. The fabrics she uses are
usually prints and are often mixed together in interesting ways. When I
saw this “Famous Designer Conversational Satin Faced Silk Chiffon”
on Moodfabrics.com, I was pretty sure it was hers even though it wasn’t
titled as such. I just adored the cats sitting on chairs, the red
apples, the little scrolled frames and the texture, and snapped some up a
few months back thinking it would certainly sell out quickly. (There is
only a little left as of this writing. If you like it I would purchase
some quickly.) When it arrived in the mail, the selvages were printed
with her name, so I had been right about it’s origins.
I knew I wanted a blouse of some sort and I knew it had to be a simple
design as to not cut up the print too much. Long sleeve printed blouses
have a way of looking like something my grandma would wear, so I opted
for a sleeveless version. I wanted it to be playful and fun to honor
Anna’s aesthetic and chose Butterick 6185.
This is kind of a sleeper of a pattern IMO. The envelope has all the
garments rendered in fun colors and prints, but they’re just
elastic-waisted separates and an unlined jacket, which I am not into.
(No offense if you are.) However, the simple V-neck blouse or dress with
the double collar I found super cute. I briefly thought about doing the
under collar of my blouse in white but dismissed it for possibly
looking too young.
The collar was cut from some black wool crepe left over from this dress
and is also from Mood but has long since sold out. Ideally I would have
used a lighter cotton-type fabric since this is a warm weather top, but
I didn’t have enough of any on hand and those collars are fabric hogs. I
find silk rather warm anyway and don’t wear it too much in the summer,
so will probably wear this in spring or fall or when I plan to be mostly
indoors. I pre-washed both the print fabric and the lining to make them
better fit into my wash-and-wear lifestyle. As long as I don’t forget
to drip dry my blouse and shrink the collars in the dryer, it should be
easily laundered.
I cut a size 12 through the shoulders and a size 10 from the bust down
and got a really good fit. The envelope picture looked a little strange
around the front armholes and for me was drafted with too much fabric in
that area. I used another sleeveless shirt pattern to guide me while
carving out the front armhole and cutting the shoulders in a good 1
inch. I’ve started really examining pattern envelope pictures for
possible issues I may have. It’s a good habit to get into to avoid
surprises. That or make a muslin of course.
I like the slightly cropped nature of this top, but after viewing these
pictures I don’t think it looks very good proportionally with pants on
my body. It’s a little short. Keep that in mind if you have a long torso
like I do. If I make this again to wear with pants I will lengthen it 2
inches. This one I will wear with skirts. There is a CB seam down the
back and I tried to cut the fabric to look as pleasing as possible at
that seam. It’s a good thing I had some extra fabric because the first
backs I cut had some awful twinning.
This collar was fun and easy to do and is sandwiched in between the
print and the lining. There is a facing included with the pattern that I
only used to cut interfacing for the lining with. If a lining is not
needed for decency, I would probably use some bias tape or a bias
binding to finish off the neckline. I always like to avoid facings if at
all possible. I put a dab of Fraycheck right at the center of the V to
avoid any threads raveling out.
Dressform pictures:
When you look closely at this fabric you can see some textural leaf
elements. Those are the sheer bits of this fabric and are really very
cool. Since the collar needed a bit more support then just a thin
chiffon to hold it up, I decided to line it. The lining I added is a black stretch silk georgette
also from Mood. It has a lovely amount of stretch to it that I bought
for another project but opted to use for this instead. It did dull a
little when washed but I didn’t mind since I was using it for lining.
Instead of making the 5/8″ narrow hem at the armhole (anyone else HATE
the look of that?!), I finished them off with some bias bindings cut
from the lining fabric.
I sewed all the seams but the neckline with French seams. Whenever I use
that type of finish on lined garments, I make sure to press the seams
in opposite directions to avoid bulk. The hemline was a simple double
fold narrow hem that was actually really trying and took a whole evening
to accomplish.
I like most of the stuff I make but I am completely smitten with this
blouse. It turned out looking exactly like what I had in my mind’s eye
and that’s always so rewarding. Also, I have another silk blouse to add
to my collection! There’s no such thing as too many silk blouses in my
closet!
Note: All of these fabrics were purchased with my Mood Fabrics monthly allowance, as part of my participation in the Mood Sewing Network.
Wednesday, July 29, 2015
Sunday, July 19, 2015
Vogue 1352 (again!) in blue jersey + a lesson in pre-washing
Here is the knee-length version of Vogue 1352 that I had cut out when I posted the June maxi version. I finished it up about two days after that. It really is a simple dress once you get the hugeness figured out.
The solid color shows the neckline gathers off nicely whereas they were lost somewhat in the print. And while I do love to wear solid colors, I find that I really don't like to sew with them much. Anyone else feel the same? I'm not sure why this is. Maybe my eyes get tired of looking at the same color all the time.
I made the same exact modifications to this dress as the previous one. The only change I made was to fold out a good bit of length to make it shorter.
This fabric is some sort of mystery polyester that I've had in my stash forever and have no idea where it came from. I rarely wash polyester knits because they don't shrink and I'm often too impatient to get on with the cutting out stage. So I didn't wash this fabric and went about stitching it up. It's quite a bit heavier then the ITY knit I'd used before and when completed the dress was really loose on the top and the armholes drooped. Oh brother, here we go again! I pitched it in my laundry basket thinking maybe if I washed it the neckline would tighten up. Imagine my surprise a week later when it came out of the dryer 5" shorter then it had been! The neckline sure didn't gap but the waistline was now really high on me and so was the hemline. I'll wear it as a bathing suit cover up I told myself. And just today when I went to put it on to shoot these pictures I find that it has stretched back to it's original length! In all my years of sewing I've never had this happen.
I guess it's a good thing I didn't wash it first??? Then I would have cut it out in it's shrunken state and it would have grown and grown after I'd finished the garment.
The solid color shows the neckline gathers off nicely whereas they were lost somewhat in the print. And while I do love to wear solid colors, I find that I really don't like to sew with them much. Anyone else feel the same? I'm not sure why this is. Maybe my eyes get tired of looking at the same color all the time.
I made the same exact modifications to this dress as the previous one. The only change I made was to fold out a good bit of length to make it shorter.
This fabric is some sort of mystery polyester that I've had in my stash forever and have no idea where it came from. I rarely wash polyester knits because they don't shrink and I'm often too impatient to get on with the cutting out stage. So I didn't wash this fabric and went about stitching it up. It's quite a bit heavier then the ITY knit I'd used before and when completed the dress was really loose on the top and the armholes drooped. Oh brother, here we go again! I pitched it in my laundry basket thinking maybe if I washed it the neckline would tighten up. Imagine my surprise a week later when it came out of the dryer 5" shorter then it had been! The neckline sure didn't gap but the waistline was now really high on me and so was the hemline. I'll wear it as a bathing suit cover up I told myself. And just today when I went to put it on to shoot these pictures I find that it has stretched back to it's original length! In all my years of sewing I've never had this happen.
I guess it's a good thing I didn't wash it first??? Then I would have cut it out in it's shrunken state and it would have grown and grown after I'd finished the garment.
Tuesday, June 30, 2015
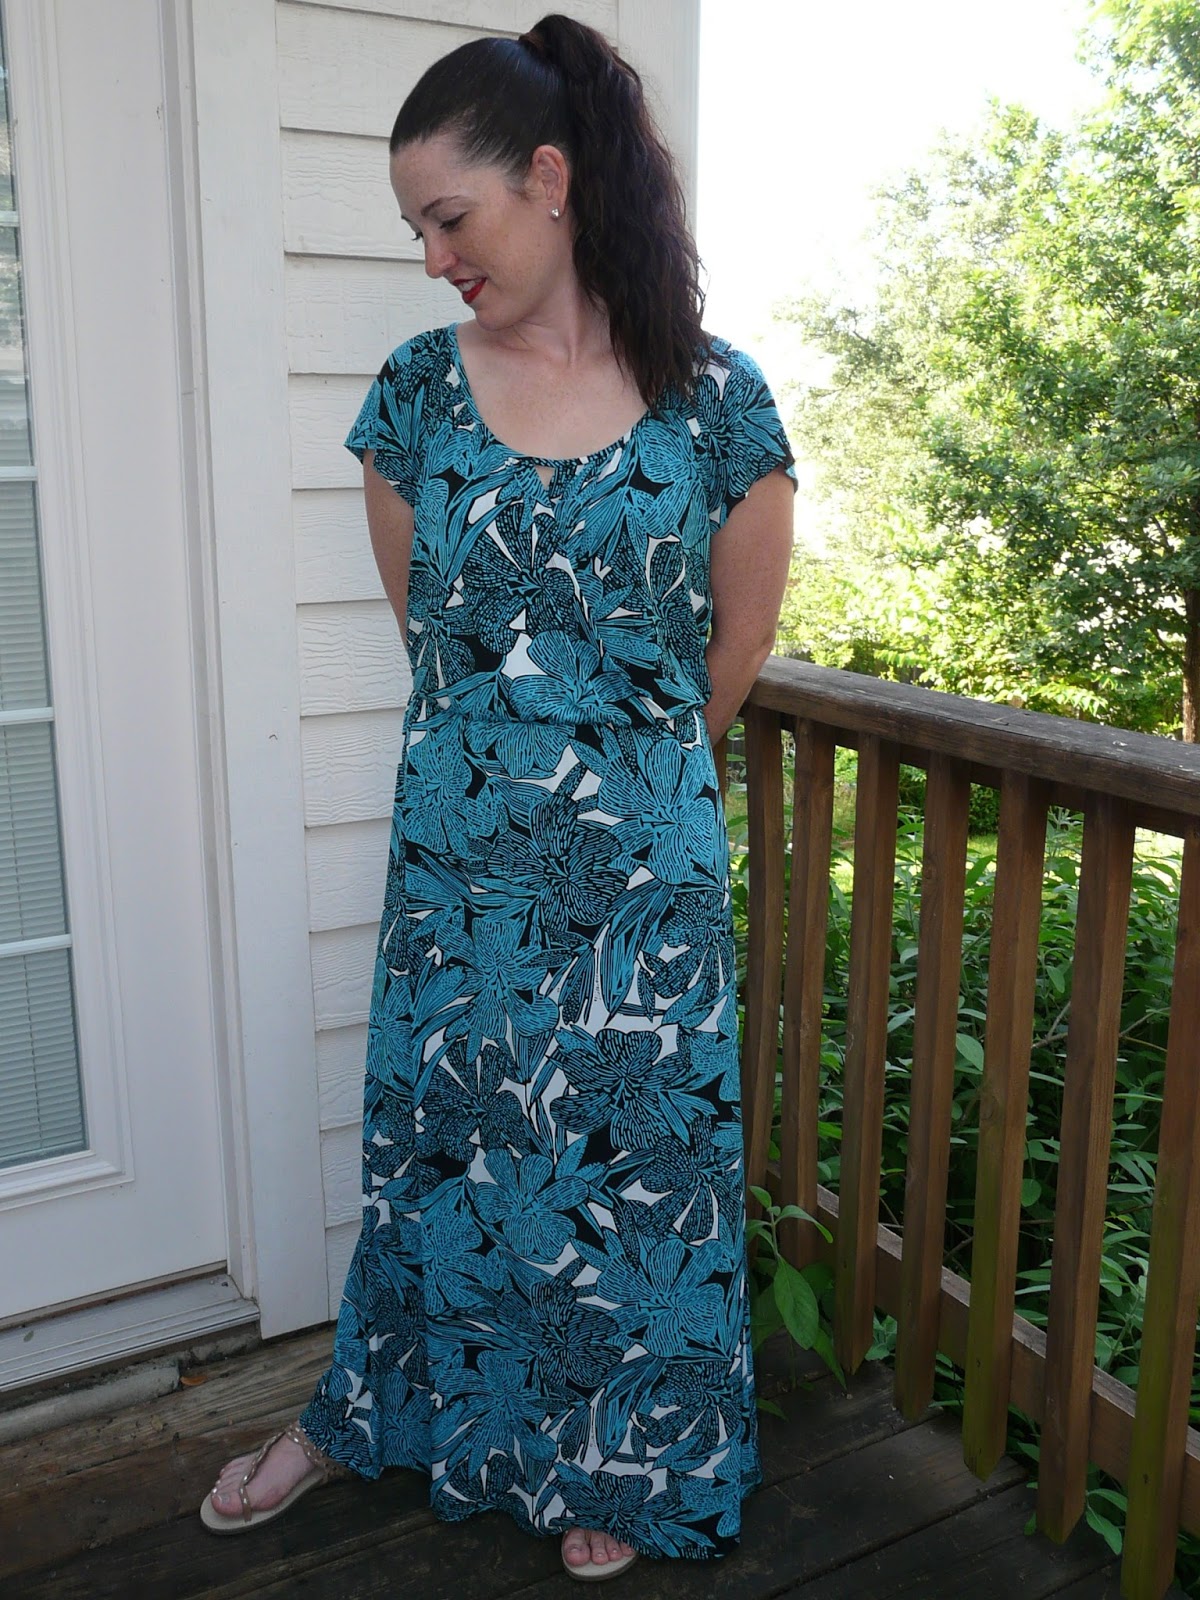
Vogue 1352 - Turquoise floral knit maxi dress
It's been practically two months since my last post and I've made a whole bunch of wadders and this knit dress. (I even made wadder curtains, which I didn't know could even happen.) This pattern is a Vogue designer pattern by Rebecca Taylor. I looked it
up on patternreview.com before cutting out the fabric and let's just say
it didn't get glowing reviews. Normally I would steer clear of those
types of patterns but I thought it would be an easy dress to nurse in
and I have really missed wearing dresses lately. All the reviews said
this pattern ran really big so I cut the smallest size available. I also
added 2 inches to the waist because I am long waisted and it looked too
short on the model.
Even with those changes it was absolutely humongous! The dress completely hung off me. The front overlay flapped open with every sway of my body. The armholes were so low my undergarments were exposed if I lifted my arms. Bother. I put it aside to work on another project, thinking I might be able to salvage those big skirt pieces for another garment. My subconscious went to work thinking of a solution and a month later I knew what to do to fix it.
I took off the neck binding, cut another binding 4 inches shorter, regathered the neckline and sewed the smaller binding to it. In the process of attaching the dress to the binding the first time, I trimmed the neckline down by 1/2" while grading the seams. When I sewed the binding on a second time, I took another 5/8" seam allowance, effectively pulling the dress up even more. The result is a comfortable and somewhat loose-fitting but still flattering dress.
The fabric is an ITY knit print that I bought online somewhere and have had in my stash forever. I only had two yards of it and had to turn the skirt pattern pieces in opposite directions to fit them both in. This dress was hemmed to wear with flats.
I may decide to wear a belt with it from time to time. After viewing these pictures I think it needs something to break up the print. Also the overlay get a little lost with the busyness of the fabric. A solid color would show that and the gathers off nicely.
I opted not to topstitch the neck binding per the instructions as I much prefer to sew invisibly by hand.
Dressform pictures:
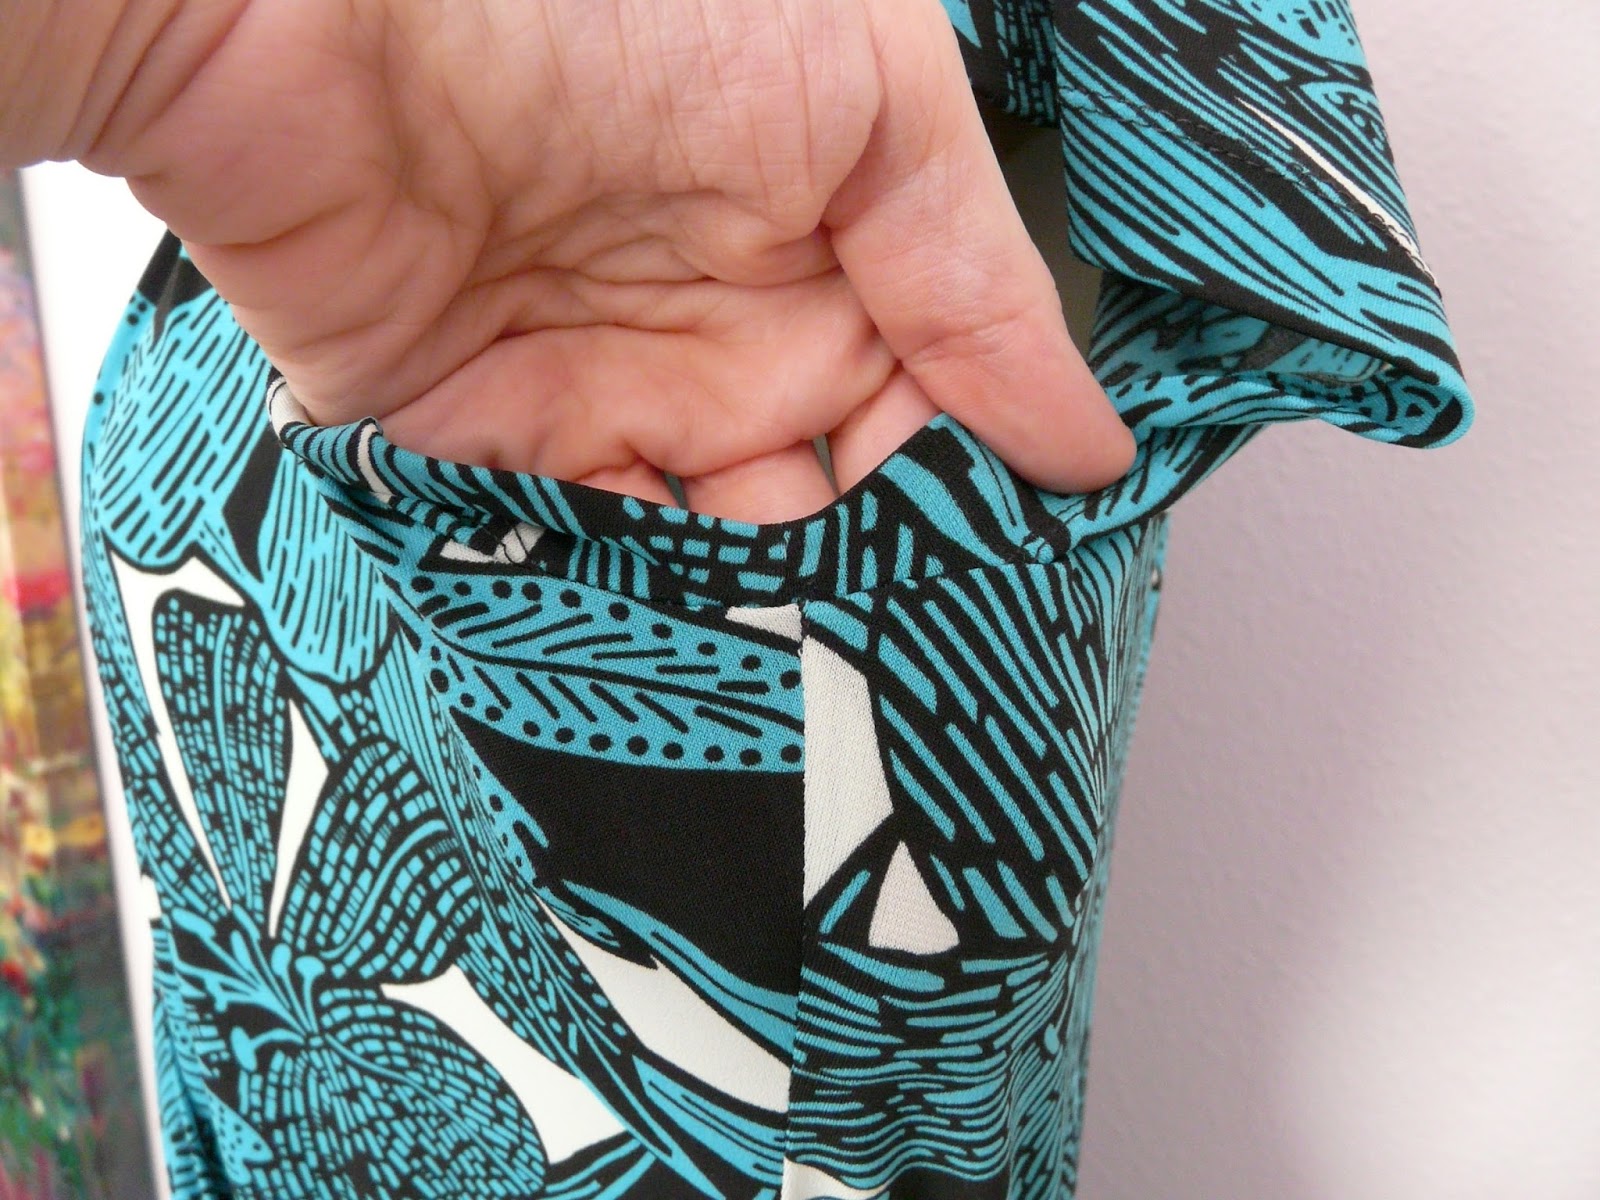
One other deviation I took was in not lapping the sleeve underarm seam allowances as the instructions say to. This is hard to explain if you haven't attempted this dress or looked at the instructions. Most of the reviews fault Vogue for having terrible drafting but I wonder if the designer dress the pattern was made from had sleeves constructed in that wonky manner. Anyway, I lined up the squares and sewed the sleeves right sides together as is the usual method. Then I hemmed and attached to the dress. I sewed a line of stitches down the side seam about 1/4", catching the underarm seam to prevent it from flipping out and being visible from the outside.
Having small children forces me to give up wearing tighter styles for casual wear, but I still like to look put together. This dress is perfect for that. Plus I can nurse my baby without having to undress - win win. I've already cut this pattern out again for a knee length version, so look out for that in a few days.
Even with those changes it was absolutely humongous! The dress completely hung off me. The front overlay flapped open with every sway of my body. The armholes were so low my undergarments were exposed if I lifted my arms. Bother. I put it aside to work on another project, thinking I might be able to salvage those big skirt pieces for another garment. My subconscious went to work thinking of a solution and a month later I knew what to do to fix it.
I took off the neck binding, cut another binding 4 inches shorter, regathered the neckline and sewed the smaller binding to it. In the process of attaching the dress to the binding the first time, I trimmed the neckline down by 1/2" while grading the seams. When I sewed the binding on a second time, I took another 5/8" seam allowance, effectively pulling the dress up even more. The result is a comfortable and somewhat loose-fitting but still flattering dress.
The fabric is an ITY knit print that I bought online somewhere and have had in my stash forever. I only had two yards of it and had to turn the skirt pattern pieces in opposite directions to fit them both in. This dress was hemmed to wear with flats.
I may decide to wear a belt with it from time to time. After viewing these pictures I think it needs something to break up the print. Also the overlay get a little lost with the busyness of the fabric. A solid color would show that and the gathers off nicely.
I opted not to topstitch the neck binding per the instructions as I much prefer to sew invisibly by hand.
Dressform pictures:
One other deviation I took was in not lapping the sleeve underarm seam allowances as the instructions say to. This is hard to explain if you haven't attempted this dress or looked at the instructions. Most of the reviews fault Vogue for having terrible drafting but I wonder if the designer dress the pattern was made from had sleeves constructed in that wonky manner. Anyway, I lined up the squares and sewed the sleeves right sides together as is the usual method. Then I hemmed and attached to the dress. I sewed a line of stitches down the side seam about 1/4", catching the underarm seam to prevent it from flipping out and being visible from the outside.
Having small children forces me to give up wearing tighter styles for casual wear, but I still like to look put together. This dress is perfect for that. Plus I can nurse my baby without having to undress - win win. I've already cut this pattern out again for a knee length version, so look out for that in a few days.
Subscribe to:
Posts (Atom)