Friday, March 15, 2013

Green + gold lace statement skirt

It's lace month at the Mood Sewing Network and in the past few months there has been a flurry of excitement and activity concerning the picking out of a choice piece of lace. I did not participate in any of that excitement, though, because way back in July of last year I used my Mood money to purchase some exquisitely beautiful green lace. (It sold out quickly so I unfortunately cannot link you to it. Here are some of their other laces.) Oh I had plans! I bought 3 yards and could have done just about anything.


So why are you looking at a plain straight skirt that could not possibly have taken all 3 yards to make? Because I screwed up, people. I had wanted to make a dress but I picked a pattern with princess seams. Despite all of my careful laying out and measuring to make sure this linear lace lined up, a dress with princess seams on the bodice simply will not look good with any fabric that has to be matched along the seamlines both vertically and horizontally. Plus I made some dreadful mistakes while cutting it out. I was very fortunate to be able to salvage the skirt portion. But oh, how my heart aches for that lost yardage!


This is my TNT straight skirt pattern, McCall's 3830, which I used for the straight skirt portion of the dress. I've used this pattern quite a lot lately and you are probably tired of hearing about it.


Thankfully I didn't make any laying out mistakes on the skirt portion, and the pattern of the lace flows nicely across the side seams and back.


I used green bemberg from Mood for the underlining and lining. I tried several different colors but kept coming back to the dark green.


I really wanted to underline this skirt so that the seams of the lace couldn't be seen through the skirt. I also wanted uninterrupted scallops along the hemline. In order to get the look I wanted, I had to sew the lace to the underlining down to the top of the scallop. Then I sewed the bottom of the lace together, clipped the lace to the seamline at the bottom of the underlining hemline, and sewed the underlining together. I pressed the scalloped lace to one side and secured it with some hand stitching. After that I had only to whipstitch the underlining in place. This is a difficult process to describe, but here is what the final outcome looks line:

This picture is of the lace and underlining with the LINING PULLED UP AND OUT OF SITE.
And here is the pattern I used, McCall's 3830:


This skirt is not what I had pictured in my mind's eye, but I do love it. The fabric is very fancy with gold thread woven throughout, so this skirt definitely fits my lifestyle more then a dress would have.

Tuesday, March 5, 2013

Yellow velvet blazer

I am in love with the color yellow and have been for the past 10 years. There aren't many shades of it I don't like except the greener/browner hues that tend to make me look sickly. My phone case in neon yellow - very easy to locate in my cavern of a purse. One time I pulled it out while wearing my neon yellow jeans and was asked if I match my phone case to my outfit on a daily basis. Ha! I only wish I had the time for that kind of fastidiousness. (Not that I would do it...) Where was I going with all this? Oh yes, I love everything yellow. So anyway, a year or so ago I spotted this yellow cotton velvet on fabricmartfabrics.com and had to have it. And what does one do with yellow velvet? Make a 70's inspired blazer of course. It's so obvious!


This is pattern 119 from the November 2009 issue of Burda. I really love to make and wear fitted jackets, and had my eye on this design for the past 3 years. Burda tends to be a few years ahead of runways in this country. The bomber jackets that were all over their magazines in 2008 and 2009 are now popping up everywhere. 70's fashions are coming back, people. Brace yourselves for it if you need to.


I really loved the wide (though cut down considerably from the pattern) notched collar, the fun pockets, the back V-yoke, the fully vented sleeves, and the miles of pick stitching. I made a muslin (in January) but for some reason only noted that it wasn't too small when I tried it on. The actual jacket body was tortuously fitted after it was cut out to get the fitted look I wanted.


Cotton velvet wrinkles like nobody's business. Take that into consideration if you are planning to ever sew with it. I like my jacket but oh my, after half a day of wearing it I look a bit disheveled. I have a few pairs of 3 hour shoes - meaning they become unbearably uncomfortable after wearing them for more then 3 hours - this will just have to be a 4 hour jacket. That gets taken off when I'm driving.

I did machine topstitching in the yellow thread I sewed the seams with, then went back with brown heavy duty polyester thread and did all the pick stitching by hand. And boy did that make it easier then trying to measure it out or eyeball it. It really helps that the machine stitches sink into the plush of the velvet; I'm not sure handstitching over machine stitches would work on a different type of fabric. I believe I cut the collar and lapels down by a whopping inch! Those were some really wide lapels/collar!


I was pretty sure the pockets as drafted were going to be huge and awkward looking, so I cut them smaller from the beginning. That turned out to be a mistake, so then I had to recut them both out and remake them the original size. Mine are stitched with the outer sides abutting the side seams, as opposed to them wrapping around to the back per the pattern design.


Finding buttons for this fabric proved difficult. All the yellow ones at my local fabric stores either weren't the right shade or were too childish looking. I finally settled on these brown ones with tan centers. Then I went back to get a third button to add under the top two and the 7/8" size had been discontinued! I had to get the bigger 1" buttons to get three the same size. Honestly, I should have stayed with the 2 button closure because the bottom of my jacket bunches up uncomfortably if I try to sit down with it buttoned closed. There is a reason longer jackets like these don't have buttons past the waist!

All my buttons were sewn on with thread shanks. Velvet is really thick and all of my buttons have 4 holes. If I'd tried to sew them on without the shank the fabric would have bunched unattractively beneath.


 These fully vented sleeve cuffs were my first lessons in mitered corners. (They were sewn before my previous dress; I put this project aside to finish that one.) You can see my tiny miscalculation on the buttonhole side. Burda, with it's notoriously bad instructions, completely dropped the ball in even mentioning how to finish off the sleeve vents. I had to really ponder what to do here, and I think it turned out pretty well.


This jacket design has a built in collar stand, something I've never seen before in a jacket. I love collar stands on blouses and dresses - insist on them in a pattern - and was really interested in seeing it here. If you look closely you can see the longer stitches of the pick stitching on the underside of the collar/lapel.


The matching Ambiance lining was ordered from voguefabricstore.com. I always go there for Ambiance if I can't find a good color match locally or from Mood. They have every color imaginable!


Here is the blackline drawing of the original design. I forgot to mention that I eliminated the welt buttonholes. I tried to do them, honestly. I am intimidated by welts but I went ahead and gave it my best shot. This velvet did not want to comply with tiny bits of fabric being sewn to it.


This is another project of mine that was labor intensive. I started work on it in January and worked on it for most of February. There were a number of times I wanted to heave it into the trashcan and move on. I do like it but I am feeling mostly relief at having it completed.

Wednesday, February 20, 2013

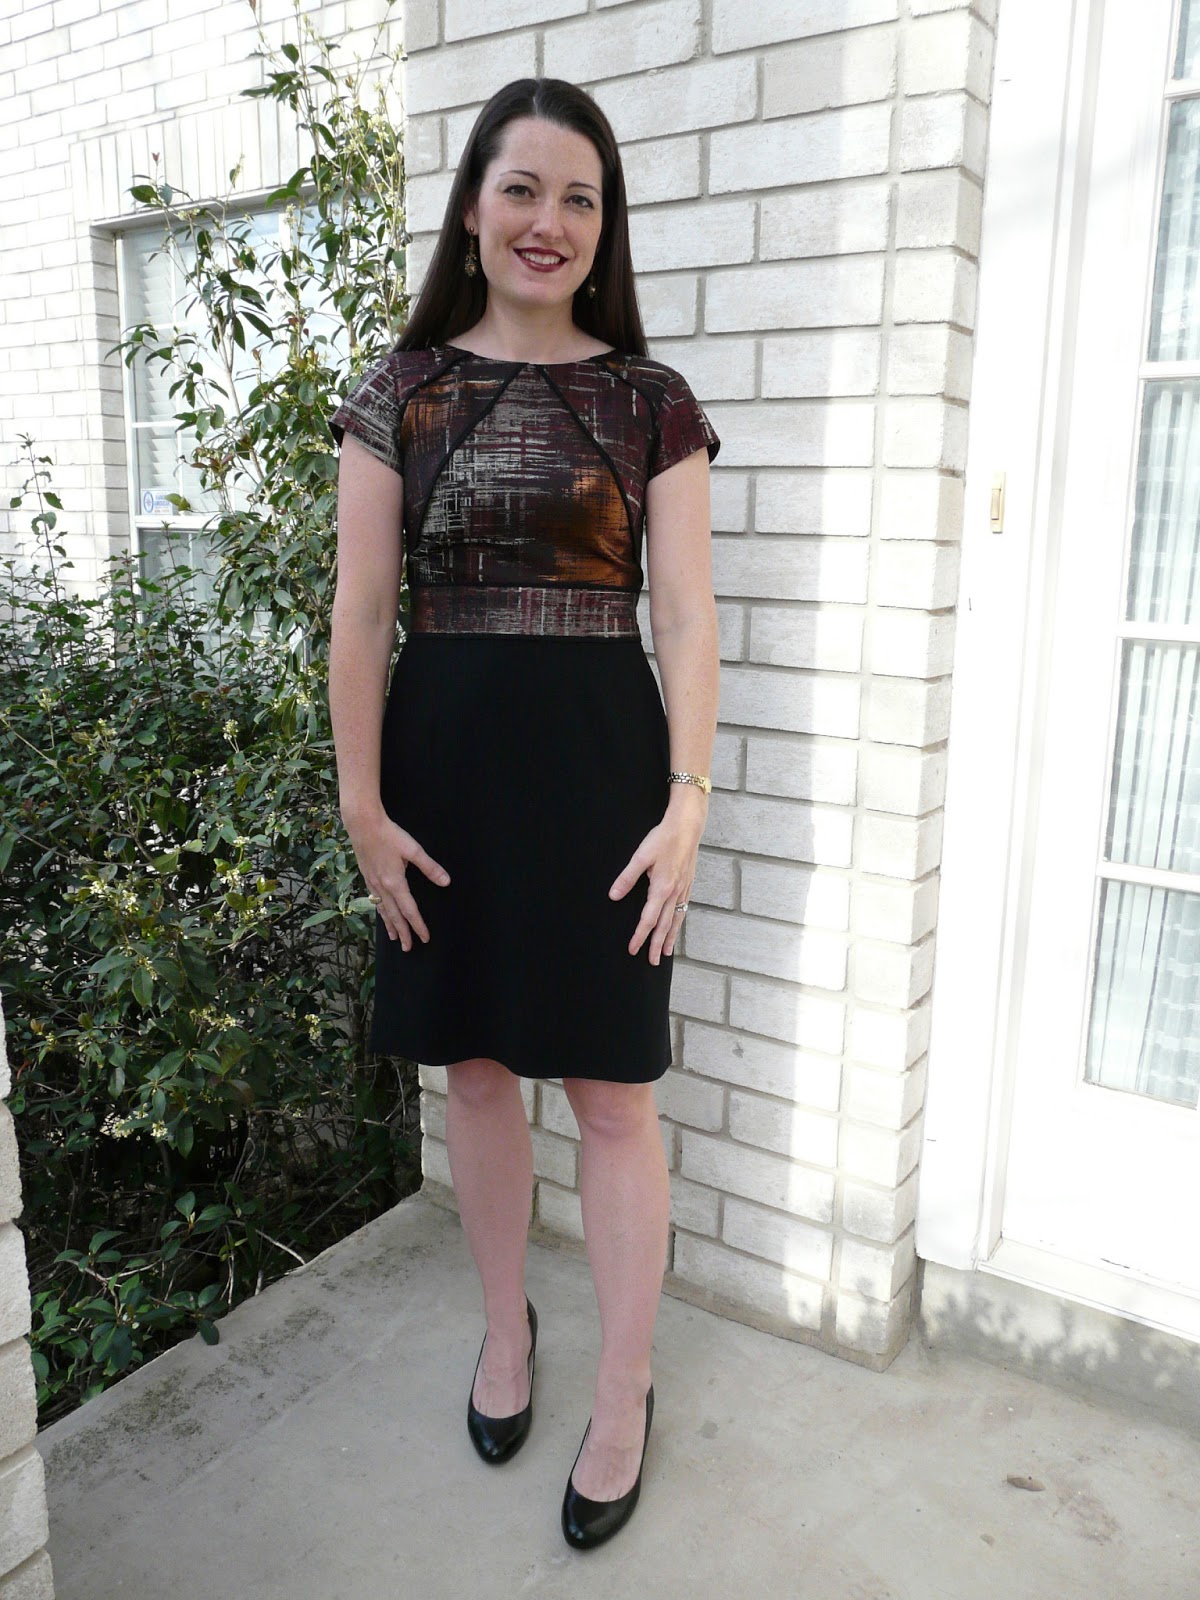
Cynthia Rowley dress in copper brocade & black wool

When I first laid eyes on this brocade at Mood, I thought it was very striking but had no idea what to do with it. I didn't want an entire dress made from it because that would be too fancy for my lifestyle. While perusing some design magazines on vacation, I ran across a dress with a bunch of folds around the neckline that I wanted to copy, but then couldn't find the right pattern in my stash. Enter this Simplicity Cynthia Rowley pattern. It had the fitted bodice that I find most flattering on my small bust, and the cut up design I wanted to show off the metallic bits of the fabric.


I made a muslin of the bodice only as I planned to make the full skirt from the pattern and never muslin full skirts. I only had to make a few tweaks to the pattern to get a good fit. (This design is definitely for the small busted!) The pieces were carefully cut out from a single layer of fabric and I tried to balance the colors all the way around. I used a black wool crepe for the flat piping and skirt.


Sometimes I do not cut out all the fabric for a garment I'm working on in a single session. I do this because if the outer fabric turns into a wadder, at least I can save my lining. Also, cutting out is tiresome. For this dress, I cut the black wool in strips for the flat piping but did not cut it for the skirt right away. However, after I'd finished the bodice I found that I did not have enough black to do the full skirt that I wanted. Oh, did I mention I began this project in January? I set it aside in order to get more of the black with next month's Mood money, and scrambled to make the lace dress previously posted.


When another yard of the black wool showed up on my doorstep this month, I quickly cut out the full skirt and stitched it up. Remember when I wrote I never muslin full skirts? Not such a good idea this time around. It's unique but peculiar shape (see pattern picture below) looked lumpy and bumpy. SO, I ripped off that skirt, threw it in the trash, and cut a straight skirt from my TNT (that's tried-and-true) straight skirt pattern, McCall's 3830. For a little interest at the hemline I included small slits. This wool crepe is a little stretchy, so I added 1/2 inch to the center front and back of my skirt lining to maintain the slightly looser fit.


I just love all the piping on this design! It was time consuming to get it all the same width but definitely worth it. The neckline is also a beautiful feature that I really like. The line drawing on the pattern didn't really register with me, so when it turned out to be a little plunging in the back I was pleasantly surprised.


Dressform pictures:


This pattern directed a lining for the top portion, and I added the lining for the skirt. It is black Ambiance from my stash.


The neckline was finished with bias tape, as were the armhole seams.


I've taught myself mitered corners. You can see them at the bottom of the black wool. They are those diagonal seams coming off the slit corners. I have some RTW (ready-to-wear) skirts that utilize this technique and have always thought it very smart looking. The lining was slip-stitched down around the slits so it wouldn't show while I'm wearing it.


These are the patterns I used:

McCall's 3830

This dress was A LOT of work but I'm thrilled with the outcome. I am not producing nearly as much as I had in previous years but rather am slowing down and really taking my time with things. I want to build a wardrobe of pieces I love and will cherish for years to come.